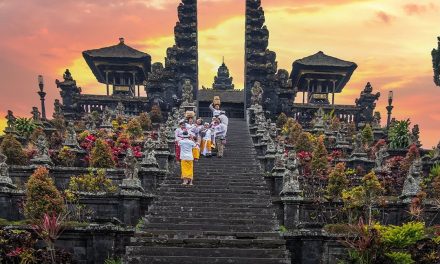
Ah, Tanah Lot. A name that evokes images of breathtaking sunsets, mystical sea temples, and vibrant ocean waves crashing against rocky cliffs. If you’ve ever found yourself wandering the paths of Bali, you know that Tanah Lot offers some of the most phenomenal backdrops for photography. As someone who has spent countless hours capturing the magic of this iconic spot, I’m excited to share some tips that will elevate your ocean view photography game.
1. Timing Is Everything
One of the best experiences at Tanah Lot is witnessing the sunset. The golden hour envelops the temple in a warm glow and paints the sky with colors that simply cannot be replicated.
Personal Anecdote: I remember my first visit to Tanah Lot. I arrived much too late and ended up capturing the temple drenched in harsh midday sun. The photos? Not great. It wasn’t until my next trip that I arrived an hour before sunset, setting up my camera on a rocky ledge with a few other eager photographers. As the sun dipped below the horizon, I captured a series of stunning shots that felt alive with color. Arriving early allows you to scout the best vantage points, and trust me, you’ll want that time to explore!
Practical Tip:
Check the sunset times before your visit and plan to arrive at least an hour early. This way, you’ll not only find your perfect spot but can also experiment with different angles and compositions as the light changes.
2. Composition Matters
When photographing such a dynamic scene as Tanah Lot, consider the rule of thirds. It’s a simple yet effective technique that can instantly elevate your photos.
Imagine placing the horizon line one-third of the way down the frame. This allows the viewer to appreciate both the temple and the vibrant sky above. During my last trip, I experimented by framing the temple off-center and incorporating some rocks in the foreground. The result? A photo filled with depth and intrigue.
Unique Insight:
Don’t be afraid to include people in your shots. I’ve found that capturing local Balinese culture, like offerings being made or families enjoying the evening, adds a layer of storytelling to the scene.
3. Play with Different Perspectives
The beauty of Tanah Lot lies not just in the temple itself but in the dramatic landscape surrounding it.
One late afternoon, I ventured down to the rocky shore right as the tide was starting to rise. The splashes of ocean water adding a sense of movement to my shots were mesmerizing. I kneeled down low, angling my camera up towards the temple framed against the setting sun. My photos turned out to be some of my favorites, showcasing an unexpected perspective.
Practical Tip:
Experiment with various angles—stand on the rocks, sit low, or even find a higher vantage point if available. Don’t hesitate to wander; sometimes the best shots come from the least expected viewpoints.
4. Use a Tripod
If you’re serious about your photography, consider bringing a tripod. Secure stability is vital, especially in low-light conditions during sunset.
During my stays, I found my tripod a bit cumbersome at first, but it was worth it. I set it up and took multiple long-exposure shots right as the sun set below the horizon. The results were breathtaking, with smooth water and glowing skies blending harmoniously.
Unique Insight:
If you’re using a smartphone, many apps can simulate long exposure effects. While not the same as a traditional method, this can yield beautiful results!
5. Don’t Forget to Capture the Details
It’s easy to get swept up in the grandeur of the landscape and the iconic temple. However, focusing on the smaller elements can create a more rounded storytelling experience.
For instance, one evening I stumbled upon a local vendor selling flower offerings. Capturing these vibrant elements against the temple created a beautiful contrast in my series of photos. It’s the details—the meaningful moments—that really resonate with viewers.
Practical Tip:
Take your time to explore your surroundings. Look for interesting textures, colors, and patterns that you can weave into your narrative.
6. Post-Processing is Your Friend
Once you’ve got your shots, don’t shy away from enhancing them. Tools like Adobe Lightroom and Photoshop can elevate your images and bring out the colors of that stunning sunset.
I remember coming home after a trip and, excited to relive those moments, spending hours editing my Tanah Lot photos. I enhanced the saturation just a bit, adjusted the shadows, and suddenly those images popped with vibrancy.
Unique Insight:
Don’t overdo it! Sometimes subtle edits can make a much more significant impact than heavy filters that may not represent the scene accurately.
In Conclusion
Trekking out to Tanah Lot for ocean view photography is an experience like no other. With planning and creativity, you can capture the majestic beauty of Bali in ways that are personal and evocative. So pack your camera, remember these tips, and above all, enjoy the process! The serenity of watching the sunset over Tanah Lot, with the sound of waves crashing nearby, will be etched in your memory long after your visit—just as I’ll forever remember that moment my camera clicked, and I captured my favorite sunset. Happy shooting!


