
Ah, Tanah Lot! The name alone conjures up images of stunning sunsets, jagged cliffs, and the rhythmic sound of waves crashing against the rocks. As a photography enthusiast, I’ve always had a penchant for capturing the sublime beauty of nature, and my journey to this iconic Balinese sea temple was nothing short of magical. In this article, I’ll share my experiences, insights, and some practical advice to help you plan your very own photography trip to Tanah Lot.
Getting to Know Tanah Lot
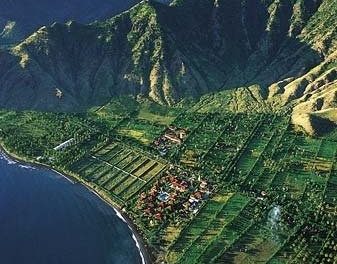
Tanah Lot is not just a temple; it’s a spiritual oasis that has mesmerized visitors for centuries. Located on Bali’s southwest coast, it stands proudly atop a rocky outcrop amidst the vast Indian Ocean. The experience of photographing this temple is made even more profound by its significance in Balinese culture, where it is revered as a temple dedicated to the sea gods.
The Journey Begins
I remember my own planning phase vividly. Excited but a little overwhelmed, I started my research on the best times to visit. I stumbled upon a gem of advice: the golden hour—hours just after sunrise and before sunset—were the perfect times to shoot. So, I decided I’d head out early to catch the sunrise.
Best Time to Visit
After gathering information from various travel blogs, I found that the best time to visit Tanah Lot is during the dry season, which runs from April to September. This is when you can expect fewer clouds and more vibrant colors in your photographs.
However, if you’re looking for unique shots, try visiting during the rainy season from October to March. Just be prepared for unexpected showers—my friend learned this the hard way after getting caught in a sudden downpour during our trip!
Timing Your Arrival
Arriving just before sunrise was a game-changer. I parked my scooter a short distance away, and as I walked toward the temple, I could already feel the promise of a spectacular morning. The tranquility of the early hours wrapped around me like a soft blanket while the world still held its breath, waiting for the sun to emerge.
Preparing Your Gear
Now, let’s talk gear. While you don’t need pro-level equipment, a good camera—be it a DSLR or a mirrorless—will make a world of difference.
Here’s what to bring:
1. Camera: Your trusty DSLR or mirrorless.
2. Lenses: A wide-angle lens for capturing the temple and landscape, and a zoom lens to get those detailed shots.
3. Tripod: Essential for long exposure shots, especially during twilight—this was a tip I learned from an online photography forum and became invaluable.
4. Filters: A polarizing filter can help reduce glare and enhance colors, making your photographs pop.
Oh, and don’t forget extra batteries! I ran out of juice mid-shoot and had to miss some shots that could have been spectacular.
Composition Tips for Stunning Shots
As I set up my tripod, I couldn’t help but reflect on composition basics. I decided to play with the rule of thirds, positioning the temple off-center while allowing the ocean waves to lead the viewer’s eye toward it.
Here’s a simple tip: look for foreground elements to add depth to your shots. I found some interesting rocks that framed the temple beautifully.
Relatable Scenarios
As I adjusted my settings, I noticed a group of tourists, each vying for the perfect spot to snap their memories. It reminded me of my early days trying to get that one iconic shot, feeling a tad self-conscious among the more experienced shooters. But I quickly learned that every photographer brings their unique perspective to the frame. Embrace your style!
Exploring Beyond the Temple
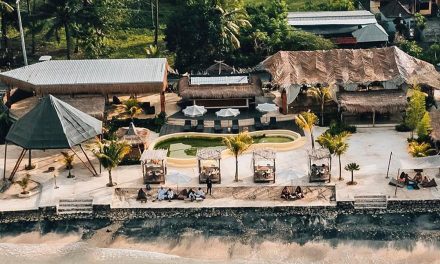
While Tanah Lot itself is breathtaking, I recommend wandering the surrounding areas. The coastal pathways offer stunning views of the ocean, and there are local markets nearby where you can capture candid shots of Balinese life.
Don’t miss the chance to explore small adjacent temples and beautiful pathways where you can find the perfect balance of nature and culture. On my trip, I chanced upon a local ceremony, and those candid shots of offerings being made and incense rising into the air became some of my favorite memories.
Capturing the Sunset
As the sun began to dip below the horizon, painting the sky with hues of orange, pink, and purple, I felt a rush of creativity. I positioned myself on the cliff’s edge, looking for unique angles as the waves crashed dramatically below.
Here’s my pro tip: Experiment with long exposures to create that dreamy look on the water with soft, flowing waves. I eventually got a shot that captured both the vibrant sky and smooth ocean swells—a testament to the beauty of Tanah Lot during golden hour.
Final Thoughts
Planning a photography trip to Tanah Lot is about more than just capturing pretty pictures. It’s an opportunity to immerse yourself in the culture and beauty of Bali. From the moment you wake up early to catch the sunrise to the quiet contemplation as the sun sets over the horizon, every moment is an experience.So, grab your camera, do your research, and set out on an adventure to one of the most photogenic spots in Bali. Your journey to Tanah Lot will not only enhance your photography skills but also enrich your soul with the incredible beauty of this iconic temple. Happy shooting!


