Hey there, fellow photography enthusiasts! If you’re reading this, you’re likely gearing up for an adventure in the stunning paradise that is Kuta, Bali. As a beginner photographer who has ventured through the vibrant streets and breathtaking landscapes of this beautiful island, I’m here to share my top tips and tricks to help you capture its magic through your lens. So grab your camera (or smartphone), and let’s dive into this Kuta Bali photography guide for beginners!
Understanding Kuta: The Photo Wonderland
Kuta is not just a beach; it’s a bustling hub of culture, surfing, and nightlife. Picture this: the golden sands of Kuta Beach, the mesmerizing sunset casting a warm glow, vibrant market stalls bustling with activity, and the rich traditions of the Balinese culture. Each corner of Kuta is an opportunity waiting to be captured. However, the key to getting those Instagram-worthy shots is knowing where to look and how to photograph it effectively.
Personal Anecdote: The Sunrise Surprise
On my first day in Kuta, I woke up at the crack of dawn, still feeling the effects of a long journey. I stumbled onto the beach, half-awake, but the breathtaking sunrise quickly snapped me into full alertness. The sun peeked over the horizon, painting the sky in hues of pink and orange. I fumbled with my camera settings, trying to remember how to get the best shot, but my excitement led me to simply point and shoot. The result? A blurry mess.
Don’t make the same mistake I did! Let’s talk about some practical tips to help you out.
Essential Tips for Capturing Kuta
1. Understanding Light
One of the most crucial factors in photography, especially for beginners, is understanding light. Bali is blessed with plenty of it! To make the most of your shooting experience, here are a few tips:
– Golden Hour Magic: The best times to take photos are during the golden hours—just after sunrise and before sunset. The soft, diffused light is perfect for portraits and landscapes alike. I remember sitting at the beach, camera in hand, as surfers glided across the water with the sun setting behind them. I waited for the right moment—and captured an unforgettable shot!
– Midday Challenges: If you’re shooting during midday, the harsh sunlight can create unflattering shadows. Try finding shaded areas, like the vibrant markets of Kuta, where colorful stalls provide bursts of color against a softer light.
2. Composition Basics
Getting the right composition can transform an average photo into an extraordinary one. Here are a few techniques to keep in mind:
– The Rule of Thirds: Imagine dividing your photo into thirds, both horizontally and vertically. Place your subject where the lines intersect for a balanced and engaging shot. I remember using this technique at the beach: I placed a surfer against the waves on one third of the frame, which created a sense of movement and depth.
– Leading Lines: Look for natural lines that draw your viewer’s eye into the photo. The beach pathway, road signs, or even the ocean waves can all serve this purpose. During a walk down Jl. Legian, I noticed the path leading towards the ocean, capturing a photo that invited viewers to follow along.
3. Capture the Culture
Kuta is rich in culture, and capturing this essence will add character to your photos.
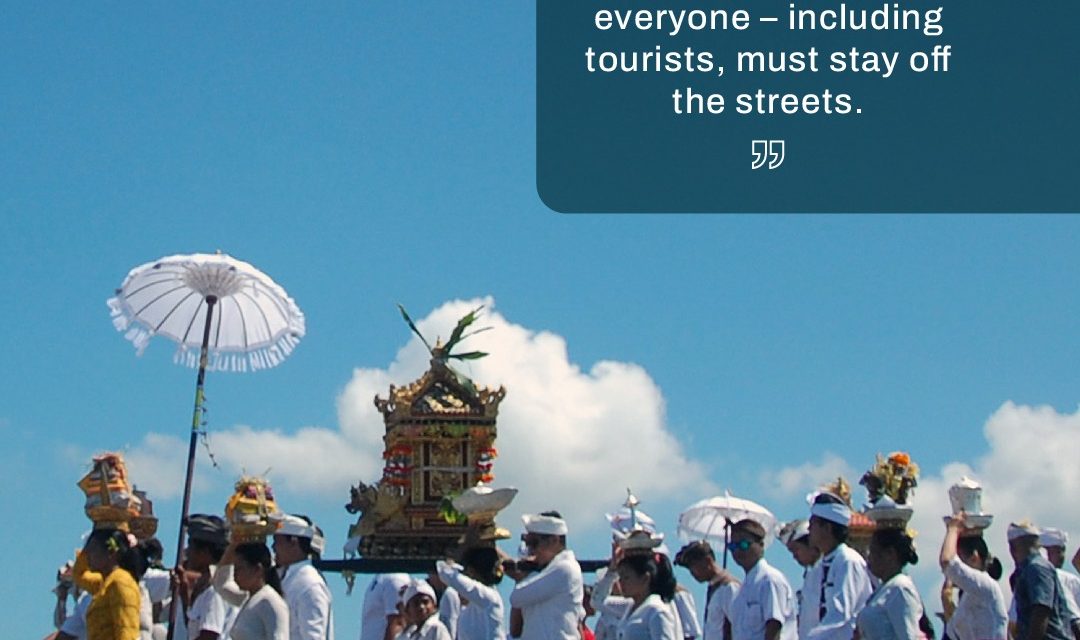
– Temples and Offerings: Don’t miss out on the intricate temples and the daily offerings that are part of Balinese life. I was lucky enough to stumble upon a local ceremony in the beachside temple, and capturing the colors and expressions of the participants told a beautiful story.
– Local People: Engage with the locals! Ask for permission to take portraits. I met a group of friendly Balinese vendors selling handmade crafts. After chatting with them, I took photos that captured their vibrant energy and smiles, which ended up being some of my favorite shots from the trip.
4. Experiment and Play
Photography is an art, and like any artist, you need to experiment. Don’t be afraid to try different angles and perspectives. I remember crawling on the sand to capture a low-angle shot of the waves crashing against the shore while shooting upward at the palm trees swaying above. The results were stunning!
– Play with Depth of Field: If you have a camera that allows manual settings, try using a shallow depth of field to keep your subject sharp while blurring the background. This technique worked wonders when I photographed the vibrant flowers right outside my guesthouse.
5. Edit with Care
Once you’ve taken your photos, don’t forget to enhance them through editing. There are plenty of user-friendly apps like Lightroom and Snapseed that allow you to tweak your images. Just a little adjustment to contrast or saturation can make your photos pop!
Relatable Scenario: The Post-Trip Dilemma
Now, let’s fast forward to after your trip. You’re excited to show your friends all the incredible photos you took, but there’s one little problem: you took a hundred pictures, and only about ten are usable. Trust me, I’ve been there too! The key takeaway? Just keep practicing. With every trip, you’ll learn more about what works and what doesn’t.
Final Thoughts
Kuta Bali is a photographer’s dream, and with this guide in hand, you’re more than equipped to make the most out of your adventure. Remember that the real essence of photography lies not just in the pictures you capture but in the experiences you embrace along the way. So, go out there, explore, and don’t forget to enjoy the journey.Happy snapping!


