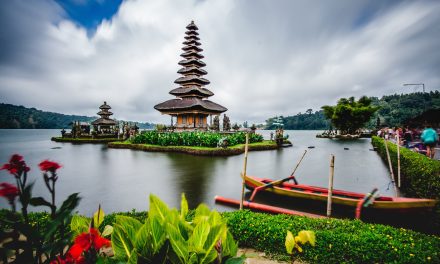
Have you ever stood atop a cliff, the salty breeze tugging at your hair, with a breathtaking view sprawling before you? That’s how I felt the first time I visited Tanah Lot in Bali, Indonesia. Famous for its iconic sea temple and mesmerizing sunsets, this destination is a goldmine for anyone wanting to capture stunning videos, especially when you incorporate the ethereal beauty of drones. In this article, I’ll share my personal journey of creating videos at Tanah Lot, provide you with practical tips, and guide you through the entire process to ensure your drone footage is as awe-inspiring as the views themselves.
Why Tanah Lot?
Tanah Lot is not just another picturesque destination; it’s a cultural treasure where the ocean meets spirituality. The ancient sea temple, perched on a rock and surrounded by crashing waves, looks like something straight out of a fantasy movie—especially during golden hour when the sun dips into the horizon. I remember setting my drone up the first time and feeling the rush of excitement—this was going to be incredible!
The Thrill of Flying
Before venturing to Tanah Lot, I’d been practicing with my drone in various locations, and nothing could prepare me for the thrill of flying over such a majestic scene. As I launched the drone, I was filled with a mix of anxiety and exhilaration. Watching it rise above the waves, capturing fleeting moments as the light danced on the water below, was simply magical.
Know the Rules: Drone Regulations in Indonesia
Before you get caught up in the excitement, it’s crucial to familiarize yourself with local drone regulations. In Indonesia, including Tanah Lot, there are specific rules you need to follow:
1. Register Your Drone: Ensure your drone is registered, especially if it weighs over a certain amount.
2. Stay Below 150 Meters: There’s a height limit for flying drones; keep it below 150 meters to avoid trouble.
3. Avoid Crowds: Be respectful of individuals and local practices. Fly during off-peak hours to avoid congested areas.
4. No Fly Zones: Always check for restricted areas—some temples and sacred sites may have rules against drone flying.
During my visit, I noticed many tourists, like me, were eager to capture the beauty of Tanah Lot but perhaps weren’t fully aware of the rules. I had made it a point to read up before arriving, which made my experience smoother and stress-free.
Best Time to Fly
Timing can be everything when it comes to aerial photography and videography.
Golden Hour Magic
Golden hour, which occurs approximately an hour after sunrise and an hour before sunset, is a videographer’s dream. The soft golden light enhances the beauty of your footage. I’ll never forget the way the temple glowed against the backdrop of a setting sun when I flew my drone high above the ocean. It created a delightful play of colors that I still cherish and often revisit to relive that moment.
Practical Drone Video Tips
Now that we’ve got the basics covered, let’s dive into some practical advice to help you create stunning videos at Tanah Lot.
1. Plan Your Shots
Before your trip, take time to plan your shots. Use Google Earth or apps like AirMap to scout the area. I jotted down a list of angles and views I wanted to capture—flying from one side of the temple to the other and following the waves crashing against the cliffs. Taking the time to plan out your shot list will save you time and allow you to focus on getting that perfect footage.
2. Slow it Down
In the past, I’d zoomed around with my drone, trying to capture everything at once and often ended up with erratic footage. A gentle reminder to myself: slow it down! Smooth, slow movements create a more cinematic feel. I typically set my drone’s speed to the slowest mode when mapping my shots, allowing the breathtaking scenery to unfold in front of your camera.
3. Experiment with Angles
Tanah Lot offers amazing perspectives. One of my favorite shots was when I flew low over the waves, circling the temple just as the water washed up against the rocks. The contrast of the stone temple against the vibrant blues and greens of the ocean was mesmerizing. Don’t be afraid to get creative and experiment—you never know what magical shot you might capture!
4. Use Filters
If you’re serious about videography, consider investing in ND (Neutral Density) filters for your drone. They help manage the light exposure, allowing for smoother footage and beautifully blurred backgrounds. I used a filter during my sunset shoot and the results were amazing—saturated colors and a more professional look.
Post-Editing Your Footage
After you’ve captured your stunning footage, it’s time to bring those clips to life during the editing process. I love to use programs like Adobe Premiere Pro or DaVinci Resolve for editing. Along with basic cuts and transitions, consider adding some soft background music that reflects the serene beauty of Tanah Lot.
Tell a Story
When I compiled my footage, I aimed to tell a story. I started with sweeping shots of the waves hitting the shore, transitioned to close-ups of the temple, and culminated with sunset views. This narrative flow keeps viewers engaged and allows them to experience the magic of Tanah Lot alongside you.
Share Your Creations
Finally, don’t keep your masterpieces to yourself! Share your videos on social platforms, YouTube, or even as part of a travel blog post. I created a small montage of my Tanah Lot adventure and shared it online; the feedback was overwhelmingly positive.
Conclusion
Creating stunning videos at Tanah Lot with drones is not just about capturing beautiful shots; it’s about embracing the moment and sharing your unique perspective. From the thrill of flying high above breathtaking landscapes to practicing responsible drone use and honing your editing skills, every step is a part of your personal journey.Remember, the next time you plan a trip, don’t forget your drone—who knows what stunning moments await just beyond the horizon. Happy flying!


