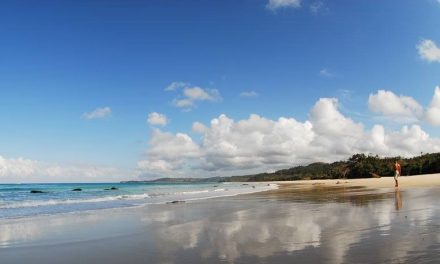
Have you ever found yourself on a breathtaking adventure, surrounded by nature’s raw beauty and the thrill of the rushing water, only to realize you didn’t capture the moment as you had imagined? Trust me, I’ve been there. Rafting down the Ayung River in Bali, with the lush green valleys and jagged cliffs towering over you, is a feast for the eyes—and the camera! But how do you snap those perfect shots amidst the excitement? Join me as I share some practical tips and tricks for photographing your Ayung River rafting experience, sprinkled with a few personal anecdotes along the way.
Get to Know Your Gear
Before diving into the water, it’s essential to familiarize yourself with your camera or smartphone. Whether you’re using a professional DSLR or a trusty smartphone, knowing how to adjust settings is key.
Personal Anecdote:
On my first rafting trip, I thought it would be enough to rely on my smartphone’s auto mode. Big mistake! I missed capturing some epic splashes and the smile on my friend’s face as we hit a particularly large wave. Now, I always try to set my exposure settings ahead of time or switch to burst mode, so I don’t miss those fleeting moments.
Practical Advice:
If you’re using a camera, practice switching between manual and automatic settings beforehand. For smartphones, download a photography app that allows you to adjust settings like ISO and shutter speed, which can improve your shots.
Secure Your Equipment
Water and expensive cameras don’t mix well. Invest in a waterproof case or a dry bag to protect your gear. I learned this the hard way when a splash from our raft soaked my friend’s camera, ruining an entire day of potential photos.
Tip:
Attach a strap to your camera during the rafting trip. This way, if it slips from your hands, it won’t go tumbling into the water!
Timing is Everything
Rafting offers constantly changing landscapes and lighting conditions. The best times for photography are during early mornings or late afternoons when the sunlight is soft and golden.
Relatable Scenario:
Picture this: you’re gliding down the river, and suddenly, you’re met with a stunning waterfall. The sun is positioned perfectly, radiating magical light onto the cascading water. Snapping a quick picture can be mesmerizing, but be ready—the lighting can change in an instant!
Tip:
Keep an eye on the clouds and changing light as you paddle. Try taking photos at different angles to see what captures the essence of the scene best.
Capture the Action
One of the joys of rafting is the thrill! You’ll want to capture the excitement of paddling, splashing, and navigating those thrilling rapids.
Unique Insight:
Instead of only taking traditional landscape shots, how about snapping close-ups of your rafting crew mid-laughter, or the intensity on their faces as they brace for impact? These candid shots often tell a better story than panoramic views.
Practical Advice:
Set your camera to burst mode (for DSLRs) or use the burst feature on your smartphone. This allows you to take multiple shots in quick succession, ensuring you capture that perfect moment as the raft hits the wave.
Play with Perspectives
Don’t just stick to eye-level shots. Changing your perspective can lead to eye-catching photos.
Example:
Try kneeling or lying on the floor of the raft to get a low-angle shot as the waves crash around you. It offers a dramatic perspective that captures the adventure in a way that standing shots simply can’t.
Tip:
If you’re feeling adventurous, hand your camera to a friend for a unique angle. Let them snap a photo of you and the group from their perspective as you paddle along.
Don’t Forget the Details
While the big moments are essential, it’s the little details that truly tell the story.
Personal Anecdote:
During my last trip, I took a moment to photograph the intricate textures of the river rocks, the splash of water droplets, and my paddle dipping into the river. These shots ended up being some of my favorites because they captured the essence of our adventure.
Practical Advice:
Practice macro photography techniques to focus on details. Don’t rush—take a moment to really look around and soak in the experience. You might be surprised at what you find.
Post-Processing Magic
Once you’re back from your adventure, a little editing can elevate your photos from ordinary to extraordinary.
Example:
Apps like Lightroom and Snapseed are fantastic for quick edits. During one editing session, I intensified the colors in a photo of the river, and the vibrant hues of blue and green leaped to life!
Tip:
Don’t go overboard with filters! Aim for natural enhancements that maintain authenticity while also showcasing the stunning landscapes.
Conclusion
Capturing the thrill of Ayung River rafting is not just about the camera; it’s about the experience. Each splash, laugh, and breathtaking view creates a memorable story. By preparing your gear, paying attention to light, securing your equipment, and thinking creatively, you can photograph an adventure that feels just as exhilarating as the ride itself.So gear up, get out there, and let the river’s magic flow through your lens. With these tips and personal nuggets of wisdom, you’re all set to turn your rafting memories into stunning photographic keepsakes. Happy rafting and even happier photographing!


